Following are the major steps needed to host a simple HTML page on your EC2 instance. These are explained in detail below.
- Step-1 : Check security group settings
- Step-2 : Connect to EC2 instance using EC2 instance connect or SSH
- Step-3 : Install web server on your EC2 instance
- Step-4 : On your EC2 instance change directory to /var/www/html
- Step-5 : Download the html file that you want to host
- Step-6: open the ipv4 address of your EC2 instance in browser and you should be able to see your html page
Step-1: Check security group settings
The security group that you have attached to your EC2 instance must allow SSH and HTTP inbound traffic. So, make sure that your security group’s inbound rules should look like below.

In the above image the first inbound rule is to allow SSH traffic. For SSH the port range is 22. In source column, you should select your IP address if you would be connecting to the EC2 instance via your local system’s shell or putty. If you are directly connecting via AWS’s EC2 instance connect then you should select EC2 Instance Connect managed prefix list which looks like this in the options :
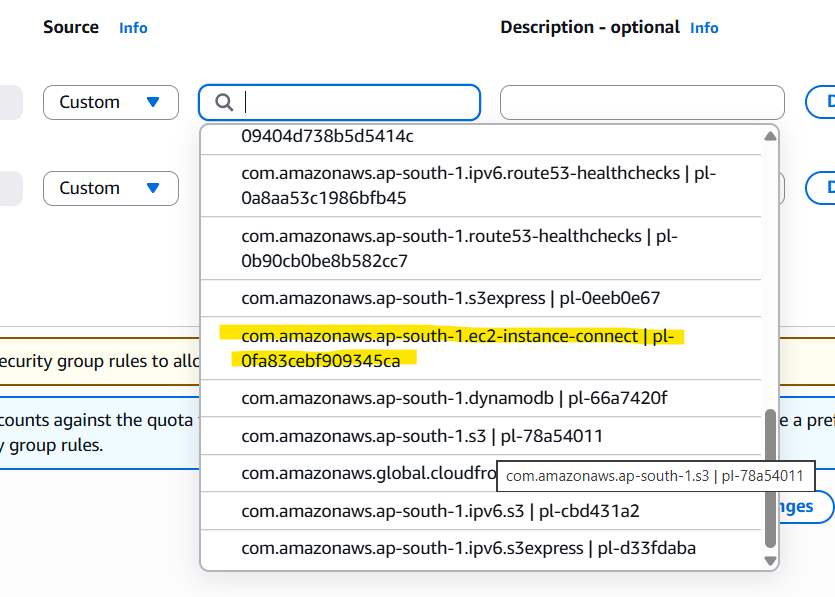
- Note:- This prefix list contains the IP address ranges that AWS manages for the EC2 Instance Connect service. When you connect through the EC2 console using Instance Connect, the traffic originates from these AWS-managed IP addresses
- In place this prefix list you can also select 0.0.0.0/0 which would also work but it means that you are allowing all the IP addresses to SSH into your EC2 instance but in perspective of security it is not a good option.
Step-2: Connect to EC2 instance using EC2 instance connect or SSH
- Go to instances section in AWS EC2 service
- Select your instance and make sure its running
- Click on the ‘Connect’ button which will open the EC2 instance connect page
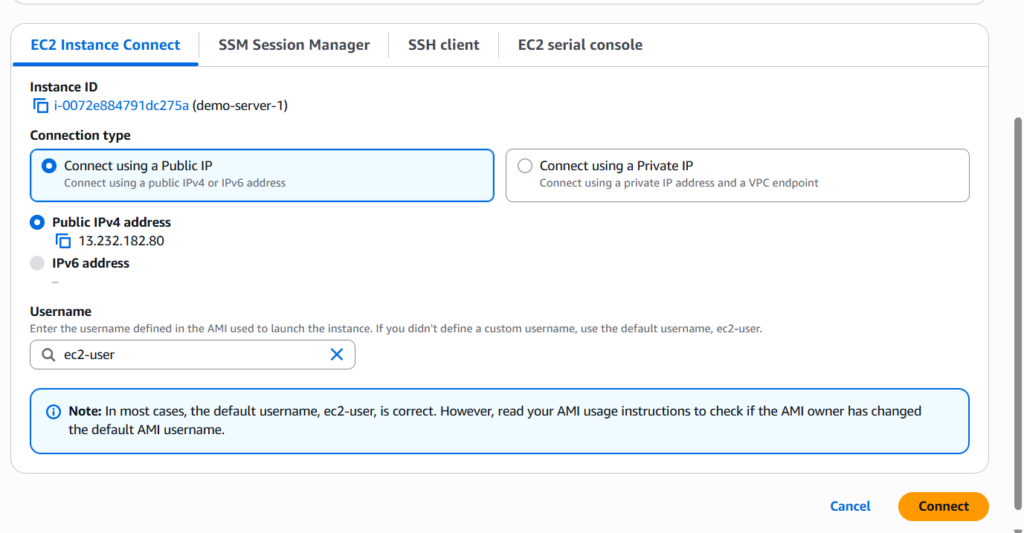
- On the EC2 instance connect page click on the connect button at the bottom right , which will open the EC2 console
Step-3 : Install web server on your EC2 instance
On the EC2 instance console enter the following commands:
sudo su

sudo update -y

sudo install -y httpd- sudo su -> allows you to change to root user
- sudo update -y -> it will update your EC2 instance
- sudo install -y httpd -> it will install apache web server on your EC2 instance
Step-4 : On your EC2 instance change directory to /var/www/html
cd /var/www/html

sudo rm index.html- cd /var/www/html -> will change directory to /var/www/html
- sudo rm index.html -> will remove any default index.html file present at /var/www/html
Step-5: Download the HTML file that you want to host
wget https://raw.githubusercontent.com/viresh-khandelwal/ec2-deployment-testhtml-file/refs/heads/main/ec2-deployment-test-file.html

ls- In the above command we are downloading a test html file into our EC2 instance at path /var/www/htmI. I have kept the test html file in my github repository and given the path to the html file in the above command.
- After the download command enter ‘ls’ command and see the list of files present in /var/www/html folder to ensure that the file you downloaded is present.
- If the file that you have downloaded to host on EC2 instance does not have the name ‘index.html’ then rename it to index.html:
sudo mv yourfilename.html index.html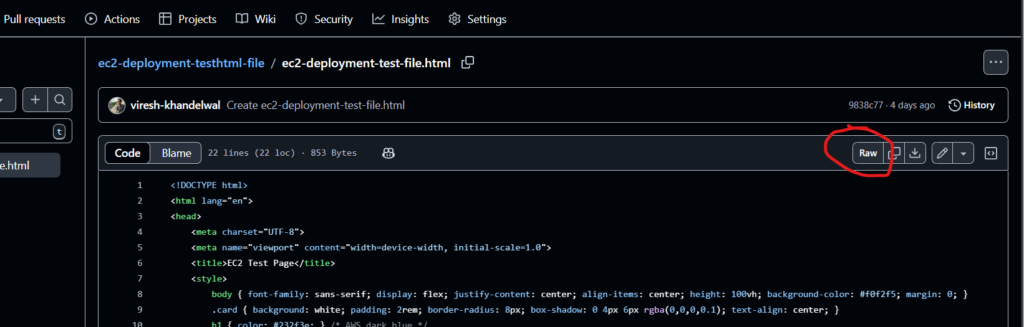
Note:- Path to the github file will be the one that you will get after clicking on the ‘Raw’ button highlighted in the above image
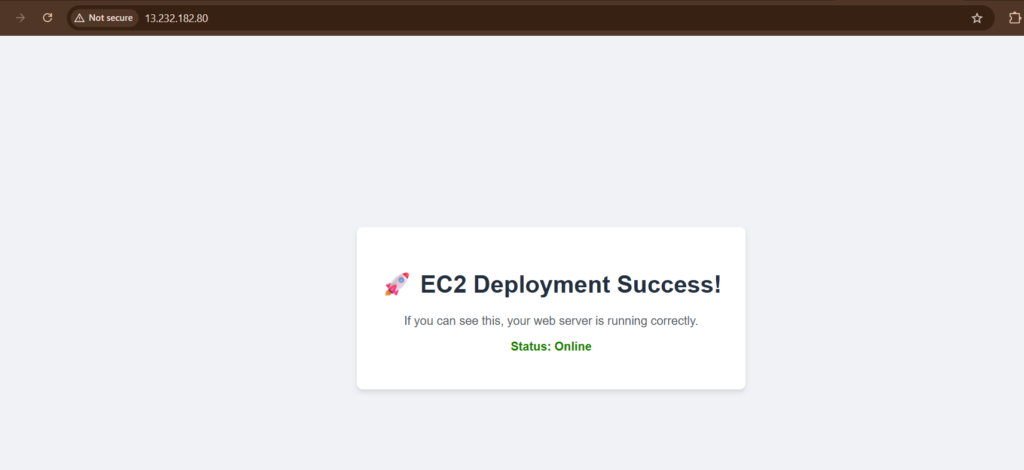
Step-6: open the ipv4 address of your EC2 instance in browser and you should be able to see your html page
- Go back to the EC2 instance dashboard
- Select your EC2 instance
- From the details section below copy public ipv4 address and paste it in a new browser tab
- ensure that http:// is appended to the ipv4 address
Voila !! There you have your html page hosted on your EC2 instance: